If you're looking to reduce your anxiety about getting attacked when you least expect it, you can study various escape methods. One standard move attackers commonly use is putting you in a chokehold. Fortunately, it's possible to get out of that using Krav Maga techniques.
Here's how to get out of a choke using Krav Maga:
- Identify the choke.
- Raise one shoulder.
- Drop the opposite shoulder.
- Sharply raise your elbow.
- Twist your hips simultaneously.
- Use your arms to gain control.
- Strike then escape.
Continue reading for the complete guide on escaping a choke using techniques from Krav Maga. First, we'll review some background information about this particular fighting system. After the methodology, we'll go into the above techniques in more detail, so you'll be ready to start practicing.

Table of Contents
A Brief Overview of Krav Maga
Krav Maga is an Israeli fighting style that incorporates techniques from various martial arts to give practitioners an advantage in violent situations. Some of the martial arts that have influenced Krav Maga include boxing, Muay Thai, judo, and Brazilian jiu-jitsu (BJJ).
Krav Maga differs from most martial arts in that it's primarily designed for self-defense. It makes use of brutal techniques designed to maim attackers so practitioners can escape to safety. Krav Maga isn't designed for competitions: Instead, it's used to train soldiers in hand-to-hand combat.
As a result, the techniques used in Krav Maga can inflict great injury and should only ever be used in self-defense situations. So if you're looking for a new move to pull off in a BJJ or judo class, you'll need to look elsewhere (unless you want to be unceremoniously discharged from a non-Krav Maga martial arts class).
However, if you're concerned about your personal safety and you want practical tools that you can use to stop a sudden attack on your person, Krav Maga offers numerous great techniques, such as proper choke escapes.
7 Steps To Get Out of a Choke Using Krav Maga
When you're in the middle of being choked, you only have 10-20 seconds until you lose consciousness completely. Therefore, you must practice all seven steps below within a safe and controlled environment and master them long before you'll need to use them.
1. Identify the Choke
Now that you have a better idea of what Krav Maga is all about, it's time to have a quick look at chokes. Since a trained attacker can use various chokes against you, it's worth addressing the main types of chokes and when you're likely to encounter them.
- Mounted Chokes. A mounted choke is when the attacker has taken you to the ground, gotten on top of you, and begun choking you. This is a very effective choke, and if you find yourself in this situation, you're in real trouble, even with some training. Fortunately, attackers don't use this type of choke too often.
- Front Chokes. A front choke is when the attacker is directly in front of you and choking you. A front choke is typically done with two hands grasping at your neck and squeezing tightly. Any choke can be dangerous, but this choke is one of the easiest ones to escape from. Typically, you can get away by stepping away from the attacker.
- Side Chokes. If an attacker were to use a side choke against you, they would first align their body alongside yours while wrapping one arm around your neck and joining it with the other arm. Also referred to as a headlock, this is another dangerous choke an attacker could use on you.
- Rear Chokes. A rear choke is the most likely choke you'd encounter in a self-defense situation since it's the choke you're least likely to see coming. A rear choke can come in different forms, but the two most common are the rear naked choke and strangling you from behind. For the sake of brevity, we'll guide you through escaping from a rear choke as this technique is the most common.
In a self-defense situation, you're most likely to encounter a choke from behind or a rear choke as it's known in Krav Maga. Rear chokes are most effective when the attacker has one arm across the front of your neck while using either their other arm or body to apply pressure on your back, causing you to choke.
However, this technique is typically used by trained fighters, not attackers on the street. Attackers on the street are likelier to use their hands to grasp your neck and cut off your air supply.
Since this situation is more likely to happen to you, the escape outlined below will be for an attacker standing behind you with their hands on your neck.
2. Raise One Shoulder
The first step to escape from an attacker choking you from behind is to create some space for you to get out. Given the fact that the attacker is standing behind you with two hands on your neck, your shoulders are free to move about as you wish.
Taking advantage of where your attacker is, raise one shoulder as high as you can. Your shoulder will push up against the attacker's arm as it reaches over your shoulder to your neck. This will create a gap while also pushing your attacker's arm out of position. Although this isn't enough space to escape, you're now free to move a little more.
You can raise either shoulder. It doesn't matter much which one you choose, as the attacker is directly behind you. What's important is that you raise your shoulder as high as possible.
3. Drop the Opposite Shoulder
Immediately after raising one shoulder, you'll need to sharply drop the other shoulder. This will leave you with one shoulder raised up high while the other shoulder has come down low. This movement needs to happen quickly; otherwise, you won't get out of the choke.
The force generated by sharply dropping your shoulder will cause the attacker to become somewhat off-balance. The assailant won't fall over or let go immediately, but it may loosen their grip on your throat. This gives you the perfect opportunity to take cover so you can get away safely.
Also, the slope across your shoulders, with one raised and one lowered, will push the attacker's arm out of position, leaving them vulnerable to your next move.
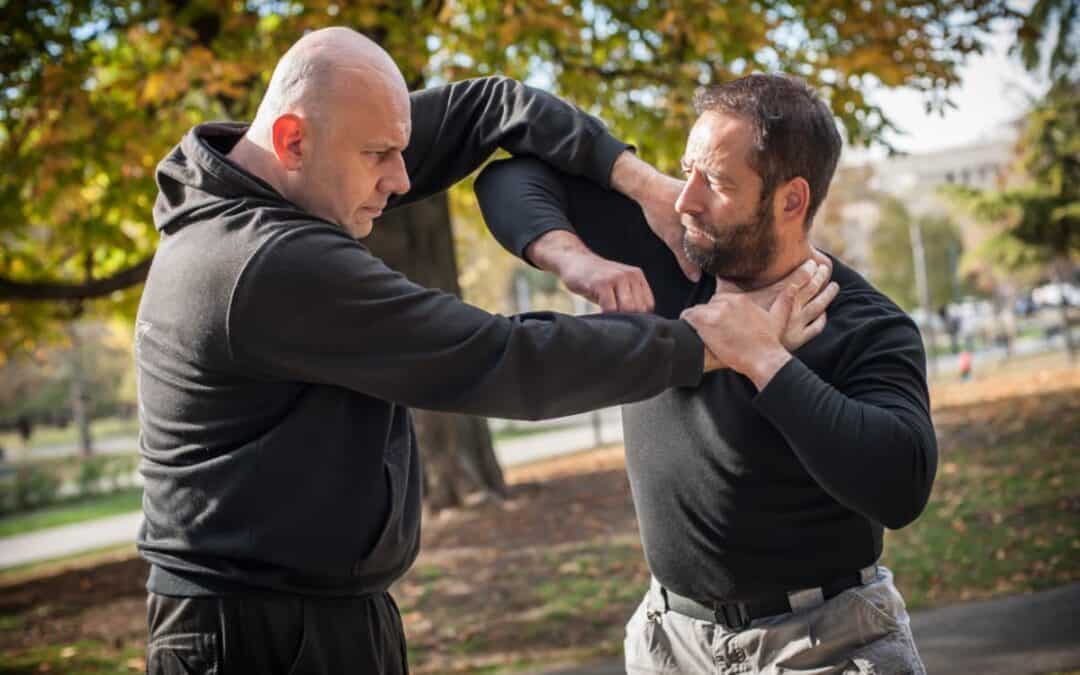
4. Sharply Raise Your Elbow
Let's suppose, for the sake of clarity, that you raised your right shoulder while dropping the left one. Your next move is to raise your right elbow up, or whichever elbow is attached to the shoulder extended upwards. While you're practicing, you can experiment with which shoulder you're most comfortable raising when you're in a tight spot.
In any case, your raised elbow will be used to brush the attacker's arms off of your throat and towards the ground, leaving them vulnerable. You mustn't wildly swing your elbow at the attacker; otherwise, you may injure your arm.
Instead, use your body weight and momentum to generate more force. This should easily brush off the attacker's hands, even if they have a size advantage. After all, Krav Maga was designed for soldiers to use, and soldiers don't tend to weigh in before a war. As a result, Krav Maga is quite effective against larger and stronger opponents.
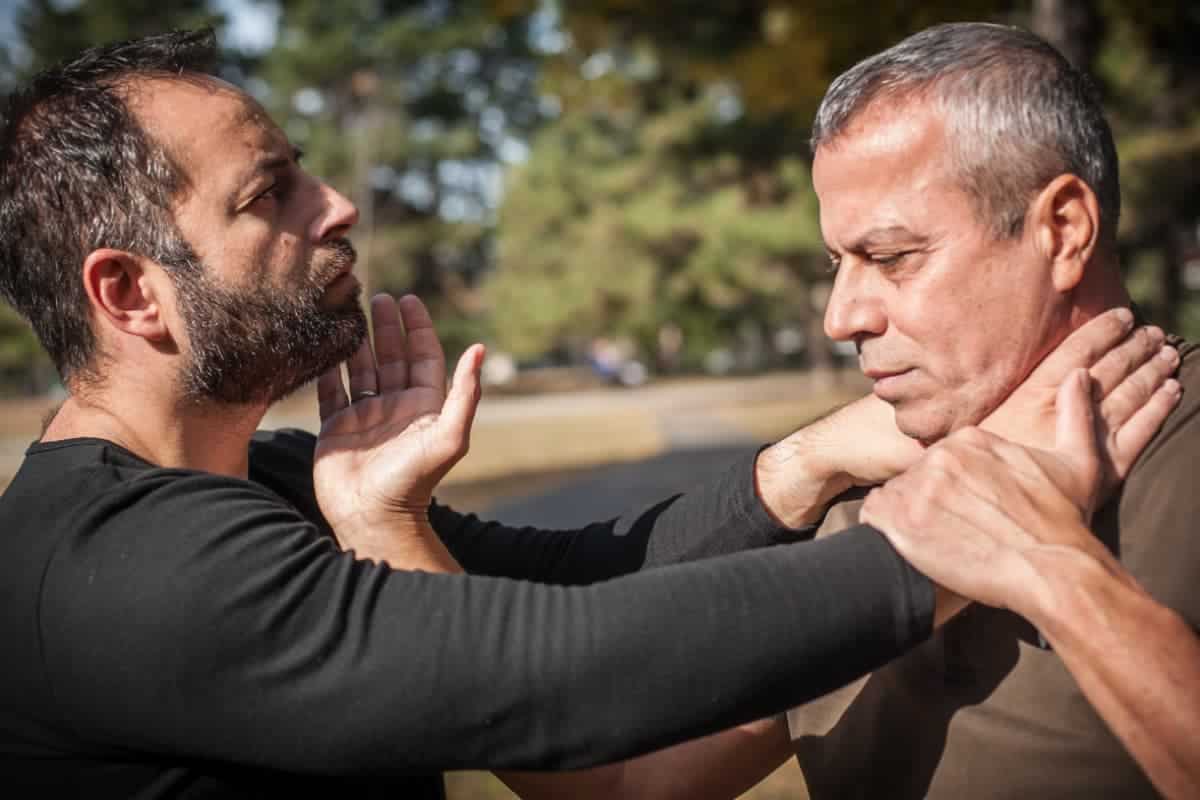
5. Twist Your Hips Simultaneously
This step is where you will release the grip of the attacker. The twisting motion used in this step will pull their arms off of your throat. This move will sharply pull the attacker's arms away from your neck and let you take back control of the situation.
Now, let's get down to the move itself. While you're raising your elbow, twist your hips and spin your feet around towards the attacker. Do so with as much force as possible, because this movement (along with the position of your shoulders and your elbow) will apply pressure to the attacker's arms, forcing them to release the choke.
While turning your hips, ensure your raised elbow is between the attacker's face and arms. This is important for releasing the choke and gaining control of the situation.
If your elbow isn't high enough, or if you don't turn with enough strength, the attacker will see your move coming, step to the side and continue to choke you. However, if you've completed all the previous steps successfully and move with enough force, you're now free from the choke.
Of course, you want to subsequently put yourself in a position where your attacker won't be able to choke you again, which is where the next two steps come in.
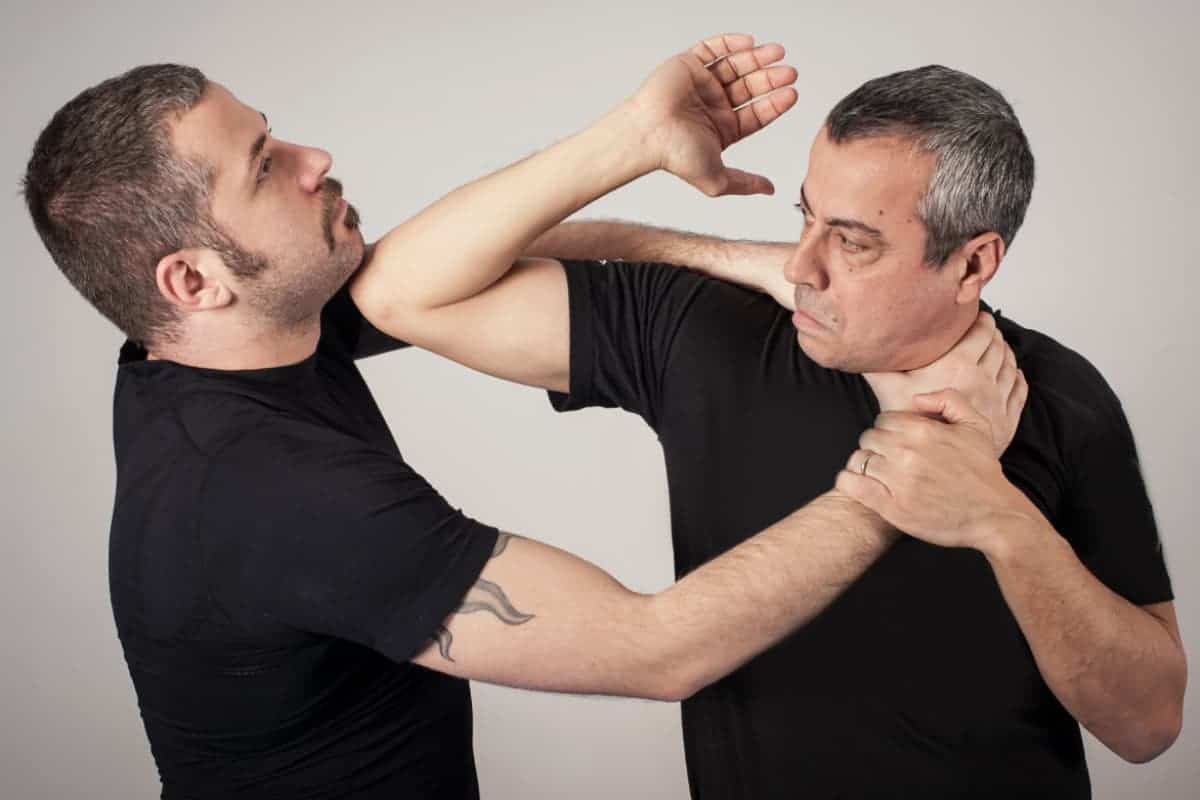
6. Use Your Arms To Gain Control
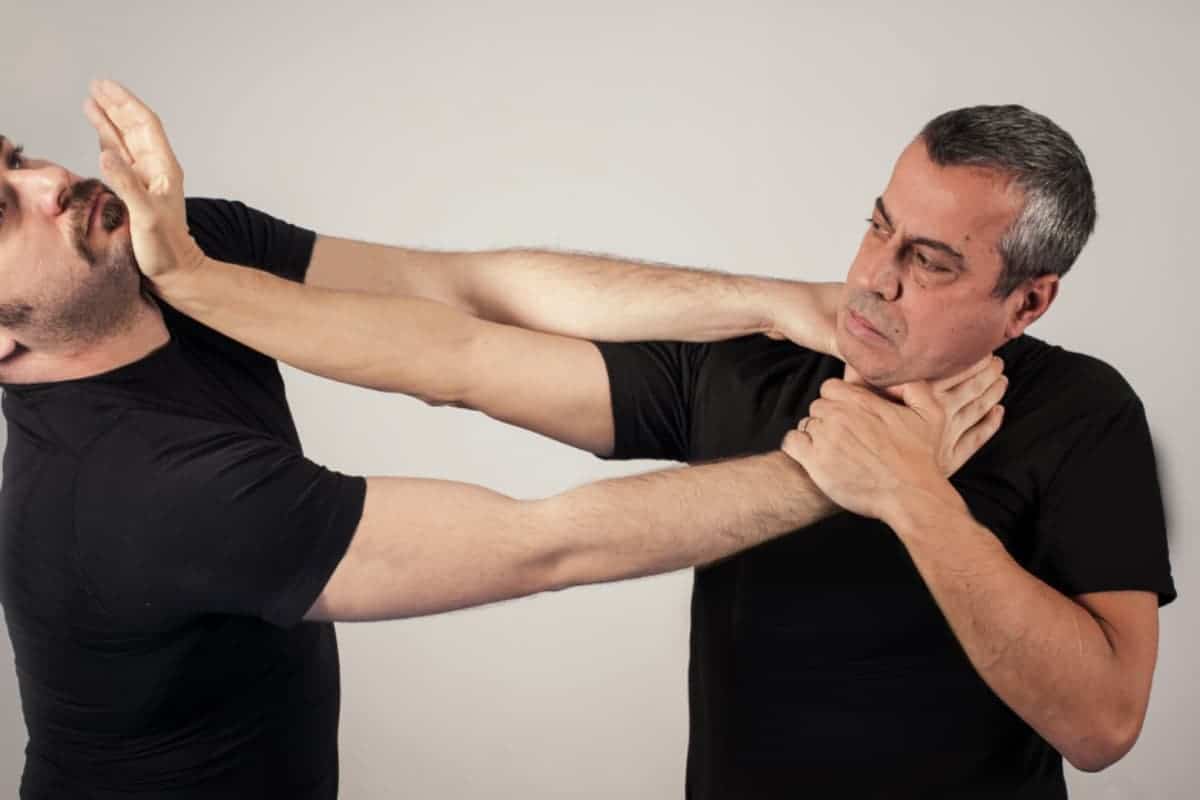
After twisting around and using your elbow to force down the attacker's arms, you'll find yourself in a position of advantage. The attacker's arms will be out of place, and their body will be twisted to one side. Using the arm you raised, follow through after turning with the elbow and grab onto the shoulder of the attacker. Next, use your free arm to control them from the side by putting your free arm across their head or the back of their neck.
Push the attacker's head towards the floor to create space between you and them. When someone's head is forced down, they lose their center of gravity, making it difficult to stand and continue their attack.
Now, you should be completely free from the choke, and you're in a position of control over your attacker. However, you don't want to wait around in this position, so you must create an opportunity to run away.
7. Strike, Then Escape
Now that you've flipped the situation on its head and your arms are now controlling the attacker, it's time to complete some strikes. Given that the attacker is in an awkward position with their arms trapped up high, you should strike using your knees.
An effective knee strike to the unprotected body of your attacker can make even the most brutal fighter wince in agony. It's best to land one to two clean and forceful strikes on your attacker while you've got control of their arms.
However, since Krav Maga isn't MMA or wrestling, you should separate away from your opponent after the two knees. Your opponent will be hurting from your strikes and flustered from their failed attack. This gives you the perfect opportunity to escape safety or get help.
The strikes are used in this situation to deter the attacker and to provide the opportunity for you to escape safely. If you don't strike the attacker, they could grab you again after you're free from the choke. The strikes make this less likely and improve your chances of getting away unharmed.
Do not continue to strike the attacker after landing the initial two blows, namely for these reasons:
- First, your attacker may be able to land a strike of their own if you stay close to them for too long, or you could injure yourself in the process of striking the attacker.
- Second, you need to consider legal reasons. What constitutes self-defense can differ depending on where you live. In some places, you'd be entitled to defend yourself or even shoot an attacker trying to choke you. In others, landing five or six blows to an attacker when you could escape after two is taking the law into your own hands.
If you manage to seriously injure your attacker, you can suddenly find yourself with an expensive lawsuit on your hands.
Therefore, it's vital to escape after landing a clean shot on the attacker when in control of their arms.
To see this technique in action, check out this informative Youtube video:

Final Thoughts
Mastering any martial art move takes hours of training. However, with some practice, you can certainly master the technique outlined above. You never know: Learning how to escape a choke effectively using Krav Maga techniques could save your life someday.